|
  
|
|||||||||||||||||||||||||||||||||||||||||||||
| Electronics & Lighting Basic Electronics - Fiber Optics - Tools  Electronics in a model can really make it sparkle and shine. People always seem to be drawn to bright, shiny things so lighting a model is always a crowd pleaser. :) Now, I am not an electronics expert by any means. Whenever I do electronics work I always research what I am doing thoroughly. This usually involves a lot of Googling and asking my good friend Clyde a lot of questions. I would highly suggest you do your research as well, because bad electronics can ruin themselves or even your model. The most basic, bare-bones light setup for your models uses LEDs and a couple of batteries. LEDs, or light emitting diodes, are your best all around choice for lighting models. Unlike normal miniature light bulbs, or lamps, they produce little heat, are brighter, come in dozens of colors, use less power and last much, much longer. Like I said, I am no electronics expert. If you want to know exactly how an LED works, check out How Light Emitting Diodes Work on How Stuff Works. For even more information, check out LED Center. All you have to do to get an LED to light up your model is hook it up to some batteries. Two or three AAA, AA, C, or D batteries will do just fine. The larger the battery, the longer it will light your LED. How many batteries you need depends on the voltage of the LED. Almost all LEDs state their voltage on the packaging or from the manufacturer. It is usually something like 2.5vdc. This means 2.5 volts. You have to do better than this number with your battery supply. Your everyday, run of the mill batteries are 1.5 volts, so two will work to light this LED. However, you need to add a 1/4 watt resistor to knock the power level down to 2.5 volts to keep from overloading the LED. Figuring out exactly which resistor you need involves a small calculation called Ohms Law: (supply voltage - voltage of the LED) / current of the LED. The current for most LEDs is only 20ma. This would be put into the calculation as .02. So, using the LED I mentioned above, our calculation would be (3.0 - 2.5) / .02 = 25. So we would need to get a resistor with a value of 25. Resistors are cheap and small so I suggest getting a nice variety because you will never know exactly which one you need. You may not always find the exact number you need, so use the next highest number. All you have to do is solder the resistor to the negative cathode of the LED (the short leg), and then hook up your batteries. Positive goes to the anode (long leg), negative to the other end of the resistor on the cathode. That's it! Your LED should light and last a long time. If you want to use multiple LEDs, you can wire them parallel and still only use two or three batteries. Wiring in parallel means calculating the resistance necessary for each individual LED, and attaching their resistors. Then you connect all of the negative leads together, and all of the positive leads together. Connect these to your battery case and you are done. This is the simplest and easiest way to get general lighting for your models. Please keep in mind that this is extremely basic and you can do much, much more with electronics in your model.
Fiber Optics are a great way to add precise lighting to the port holes of large ships, instruments in a cockpit or even in figures with electronic components like Vader or R2. Fiber optics are simply thin filaments (usually of plastic) that transmit light down their entire length. They require no power of their own. All you have to do is provide a light source at one end of the filament, and the other glows brightly no matter how much you bend, twist or manipulate it. It glows the same color and intensity of the original source light. Fiber optics come in many, many varieties and sizes. I suggest you check out Fiber Optic Products to see what is available. Look in the sections labeled "Jacketed Fiber" and "Unjacketed Fiber" and you should find out what I mean. I find myself using LG64 cable the most. It is good for both small windows in large ships and for instrument panels in fighter cockpits. LG64 cable is a 3.5mm jacketed bundle of 64 .265mm fibers. That's a mouthful, huh? Basically it means that it has 64 fibers in it that are .265mm in diameter each, and all together the bundled fiber is 3.5mm in diameter. Using fiber optics is very easy, but very tedious. Basically what you have to do is remove most of the jacketing from the fibers except for a small stub at the end. This keeps all the fibers together and will make it easier to point at a light source. Once you have the jacket removed, you can thread the fibers through all the little holes in your model where you need light. For LG64 cable I use a #81 drill bit to drill my holes. This is very small and extremely fragile. Be very careful with it or you will break it. Once you have your fiber threaded into all the holes, you have to decide how you want to glue and trim the fibers. You can leave some excess hanging out of the holes, glue them in place from the inside, and then trim them after the glue dries. Or, you can push the fiber back into the hole until it is flush with the outside and then glue it. I tend to do a little of both. I'll thread the fibers through the holes with a bunch hanging outside the hole. Once I get them all threaded, I'll push them all back until only about a quarter inch is sticking out. Then I glue them in place from the inside with white glue. White glue or fast setting epoxy is your best choice for fiber optics. Super glue will make the fibers brittle and break, and solvent glues will melt the plastic fiber. White glue works best for me because it is super cheap, strong and easy to use. Once my glue dries thoroughly, I go back and trim the excess fiber from the outside of the ship. Very easy to do, but if you've got a lot of port holes, get ready for a lot of tedious work. Once you've got all your fibers threaded, glued, and trimmed, just take that little portion of the bundle that is still jacketed and place it in front of an LED of your choice and all the little portholes will glow beautifully! You can light as many bundles as you want from just one LED. As long as the light shines on the ends of the fibers, the other ends will glow.
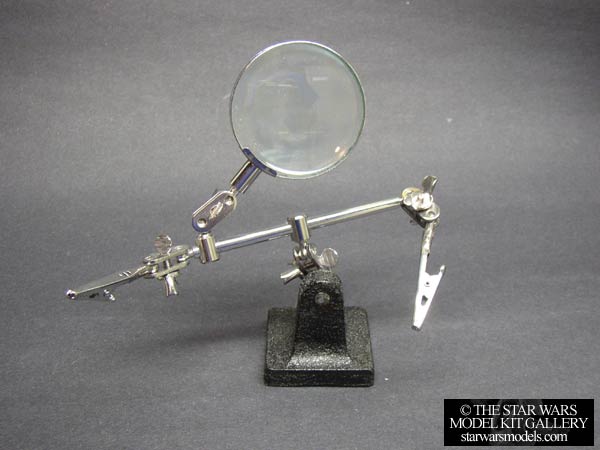
Tools - You'll need a lot of different tools and supplies as your electronics and lighting capabilities increase. Here are some of the ones I use regularly:
|
|||||||||||||||||||||||||||||||||||||||||||||
|
Copyright © 2001-2016 starwarsmodels.com.
No portion of this site is to be reproduced in any way, shape or form without
my permission beforehand. |
|||||||||||||||||||||||||||||||||||||||||||||